Getting Started
Welcome to Torkbiz ! Thanks for purchasing our template.
It is our great pleasure that you purchased our template. We would like to extend
our
heartfelt thanks to you.
Our Torkbiz Template has well-organized, easily understandable files
structure,
supports superfast data processing, works pretty well on different kinds of
browsers, including Chrome, IE, Edge, Firefox, Safari, and so on. On top of
those,
it provides 4 demo and fashionable design,
fully customizable components.
Before using this template, be sure to check this doc carefully. By collecting
various opinions of customers, we’ve made such a nice document to give you clear
understanding of the template.
If you can not find answers in documentation or have opinions to develop this
Torkbiz
Template, feel free to contact us
support@thetork.com, and we will always be with you
and will
appreciate your kindness.
- Different Home Pages
- Total 24+ HTML Files
- Fully responsive
- Clear & Neat design
- Latest Bootstrap 5.X Based
- Font Awesome Icon
- Smooth animation
- SEO Friendly Code
- Optimize Speed
- Browser compatibility (IE10+, Chrome, Safari, Firefox, Opera)
- Well documented
Files Structure
Well-organized and easily understandalble structure
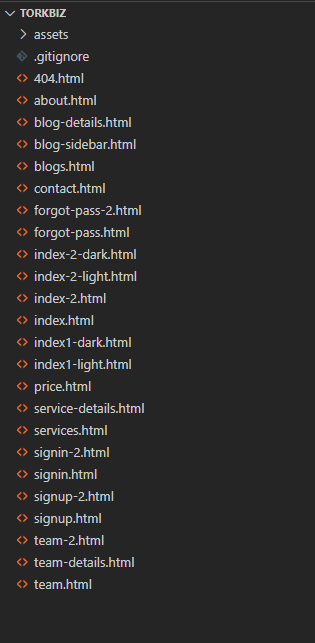
Unzip the archive and find out the folder "buyer-file -> Torkbiz". There are
all the template files in this folder. You can open the following files for
viewing in browser.
- assets/css — folder with css files.
- assets/fonts — folder with icon fonts.
- assets/images — folder with image files.
- assets/js — folder with Javascript files.
- assets/sass — folder with SCSS files.
- index.html — Home One
- index1-light.html — Home One Light
- index1-dark.html — Home One Dark
- index-2.html — Home Two
- index-2-light.html — Home Two Light
- index-2-dark.html — Home Two Dark
- and others necessery HTML Files
.
How to run
Start Building, you need to take these following steps.
02. Pages
03. Fonts
We've used google font in TorkGo template . You can Change it with any
google fonts that you preffer & also you can add custom font in sass file----
sass/base/fonts.scss
    //== all fonts importing
    @import url('https://fonts.googleapis.com/css2?family=Nunito+Sans:ital,wght@0,200;0,300;0,400;0,500;0,600;0,700;0,800;0,900;0,1000;1,200;1,300;1,400;1,500;1,600;1,700;
    1,800;1,900;1,1000&family=Ubuntu:ital,wght@0,300;0,400;0,500;0,700;1,300;1,400;1,500;1,700&display=swap');
04. Source File (CSS)
    <!-- favicon -->
    <link rel="shortcut icon" href="assets/images/favicon.png" type="image/x-icon">

    <!-- vendors css -->
    <link rel="stylesheet" href="assets/css/bootstrap.min.css">
    <link rel="stylesheet" href="assets/css/aos.css">
    <link rel="stylesheet" href="assets/css/all.min.css">
    <link rel="stylesheet" href="assets/css/lightcase.css">
    <link rel="stylesheet" href="assets/css/swiper-bundle.min.css">

    <!-- main css for template -->
    <link rel="stylesheet" href="assets/css/style.css">
05. Source File (JS)
  <!-- vendor plugins -->
    <script src="assets/js/bootstrap.bundle.min.js"></script>
    <script src="assets/js/all.min.js"></script>
    <script src="assets/js/swiper-bundle.min.js"></script>
    <script src="assets/js/aos.js"></script>
    <script src="assets/js/purecounter_vanilla.js"></script>
    <script src="assets/js/fslightbox.js"></script>
    <script src="assets/js/custom.js"></script>
How To Customize
Logo change
Here is your main logo code. To add your logo, replace logo.png from images/logo/
directory with your logo in PNG format.
<img src="assets/images/logo/logo.png" alt="logo">
Note: Keep your logo inside the ./assets/imaegs/logo folder.
The logo size should be minimum
150 X 65
pixel.
This is Menu navigation codes.
  <ul class="menu">
    <li>
        <a href="javascript:void(0);">Home</a>
        <ul class="submenu">
            <li><a href="index.html">Home One</a></li>
            <li><a href="index1-light.html">Home light</a></li>
            <li><a href="index1-dark.html">Home Dark</a></li>
            <li><a href="index-2.html">Home Two</a></li>
            <li><a href="index-2-light.html">Home light</a></li>
            <li><a href="index-2-dark.html">Home Dark</a></li>
        </ul>
    </li>
    <li>
        <a href="javascript:void(0);">Services</a>
        <ul class="submenu">
            <li><a href="services.html">Services</a></li>
            <li><a href="service-details.html">Services Details</a></li>
        </ul>
    </li>
    <li>
        <a href="javascript:void(0);">About</a>
        <ul class="submenu">
            <li><a href="about.html">About Us</a></li>
            <li><a href="price.html">Price</a></li>
            <li><a href="team.html">Team</a></li>
            <li><a href="team-2.html">Team 2</a></li>
            <li><a href="team-details.html">Team Details</a></li>
        </ul>
    </li>
    <li>
        <a href="javascript:void(0);">Pages</a>
        <ul class="submenu">
            <li><a href="blog.html">Blog</a></li>
            <li><a href="blog-sidebar.html">Blog Sidebar</a></li>
            <li><a href="blog-details.html">Blog Detils</a></li>
            <li><a href="signup.html">Sign Up</a></li>
            <li><a href="signup-2.html">Sign Up 2</a></li>
            <li><a href="signin.html">Sign In</a></li>
            <li><a href="signin-2.html">Sign In 2</a></li>
            <li><a href="forgot-pass.html">Reset Password</a></li>
            <li><a href="forgot-pass-2.html">Reset Password 2</a></li>
            <li><a href="404.html">404 Error</a></li>
        </ul>
    </li>
    <li><a href="contact.html">Contact</a></li>
  </ul>
To change the Menu item or menu name you have to edit in the tag Your Menu Name
If you wanna delete a menu item from the menu just remove the menu item above
Section Styles
Here is your section structure.
      <section class="section-name padding-top padding-bottom">
        <div class="container">
          <div class="section-header">
              .....
          </div>

          <div class="section-wrapper">

          ...sections all content goes there

          </div>

        </div>
      </section>
- If you need diffrent style of section header - just you add the utility
classes "section-header--left or section-header--middle" class
- In the class="section-class" you can replace with your desired class.
- the section-header div you can add your heading of sections and tagline of
sections.
- ou can add your content on the 2nd sectionname__wrapper div.
Section With Background
you can select secondary background dark color. To add color, just simply add the
class bg--primary to the section class.
  <section class="section-name bg--primary">
    <div class="container">
      ...
    </div>
  </section>
Change Carousel Setting
Torkbiz used swiper slider for carousel. In order to give setting to swiper
slider, you should customize it as you want.
    {
        spaceBetween: 20,
        autoplay: false,
        slidesPerView: 4,
        isCustomNav: true,
        breakpoints: {
            576: {
                slidesPerView: 2
            },
            992: {
                slidesPerView: 3
            }
        },
        navigation: {
            nextEl: '.swiper-nav .swiper-next',
            prevEl: '.swiper-nav .swiper-prev'
    }
How To Change Style
Modify SASS
Please open the
static/scss/demos,
add the scss code you want.
Thanks to the hot reloading, you could the style changes immediately.
Example: Base variables
Default Configuration variable in
assets/scss/abstracts/_variables.scss
        //===================== Variables start===================== //

        // theme colors
        $brand-color: var(--brand-color);
        $secondary-color: var(--secondary-color);
        $tertiary-color: var(--tertiary-color);


        $body-color: var(--body-color);
        $border-color: var(--border-color);
        $social-border-color: var(--social-border-color);

        $form-border: var(--form-border);

        // text colors
        $title-color: var(--title-color);
        $text-color: var(--text-color);
        $text-color-light: var(--text-color-light);


        $white-color: var(--white-color);
        $black-color: var(--black-color);

        // background colors
        $bg-color: var(--bg-color);
        $bg-color-1: var(--bg-color-1);
        $bg-color-2: var(--bg-color-2);
        $bg-color-3: var(--bg-color-3);
        $bg-color-4: var(--bg-color-4);
        $bg-color-5: var(--bg-color-5);
        $bg-color-6: var(--bg-color-6);

        $bg-white: var(--bg-white);

        // extra colors
        $bg-team: var(--bg-team);


        // form
        $form-border: var(--form-border);
        $form-focus: var(--form-focus);

        // Action colors
        $error: var(--error-color);
        $warning: var(--warning-color);
        $success: var(--success-color);
        $danger: var(--danger-color);


        //=====================>>>\ Variables end ===================== //


        //Template Font family

        $title-font:'Ubuntu',
        sans-serif;

        $text-font:'Nunito Sans',
        sans-serif;

        //Template font sizes
        $fs-base: 16px !default;
        $fs-small:14px;

        $fs-h1: 56px;
        $fs-h2: 40px;
        $fs-h3: 32px;
        $fs-h4: 28px;
        $fs-h5: 24px;
        $fs-h6: 18px;


        //Template transition
        $transition:all .3s linear;
Change Log
Welcome to Tork ! Get familiar with the Stripe products and explore
their features:
June 20, 2023
Version Name
Initial The initialize
template
Change Copyright
You can change copyright text from here.
    <div class="footer__copyright">
        <div class="container">
            <div class="text-center py-4">
                <p class=" mb-0">Torkbiz © {{ new Date().getFullYear() }} | All Rights Reserved </p>
            </div>
        </div>
    </div>